
Scanner
Learn how to use the Scanner component.
Scanner Component Documentation
The Scanner component allows users to filter stocks based on specific criteria. This guide will walk you through the features and functionalities of the Scanner, including how to use the filter button, create custom profiles, select columns to display, utilize the popout feature, and share filters with the community.
Using the Filter Button
The Scanner features a Filter button, represented by the Funnel icon. Clicking this button opens a menu where users can select from predefined filters or create custom filters.
Default Filters
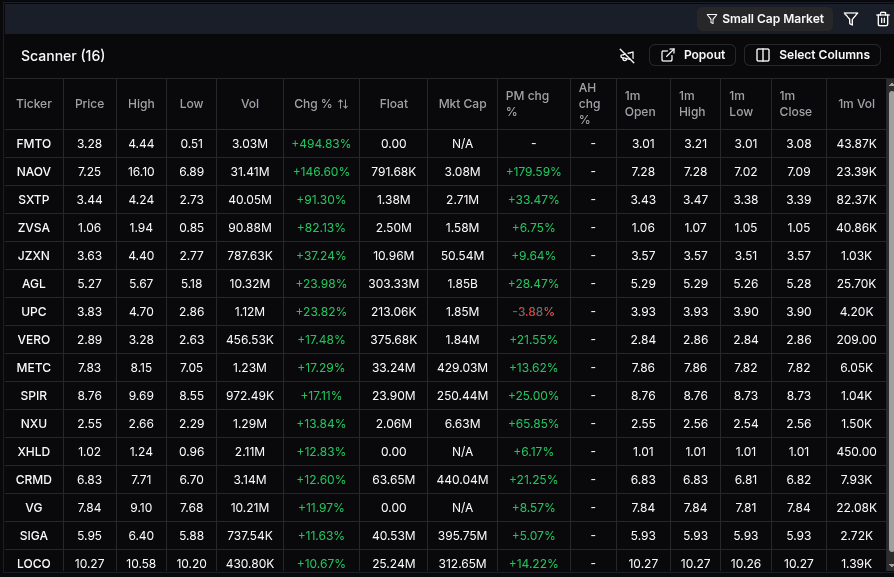
The Scanner provides two default filters:
-
Small Cap Market
- Price Range: $1 - $15
- Change Percentage: 10% or more
- Volume: 400k or more

-
Large Cap Market
-
Price Range: $15 - $100
-
Change Percentage: 5% or more
-
Volume: 300k or more

-
Creating a Custom Profile
Users can create a custom profile by clicking on the + icon located at the top left of the Scanner interface. Follow these steps:
- Click the + icon.

- Enter a name for your new profile.

- Once created, the new profile will be auto-selected.

Adding Filters to Your Profile
After creating a custom profile, you can add new filters by following these steps:
- Click on the Add Filter button.

- Choose the desired filter from the available options.

- Once you have added all necessary filters, click Save and then Apply to apply them.

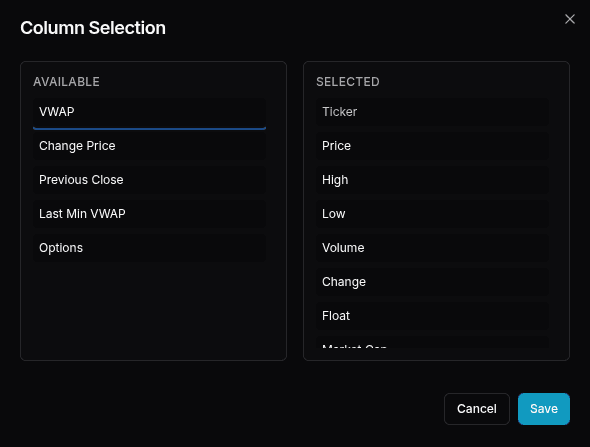
Selecting Columns to Display
Users can customize the columns displayed in the Scanner by clicking on the Select Columns button. This will open a popup showing the selected and available columns:
- Selected Columns: Displayed on the right side of the popup.
- Available Columns: Displayed on the left side of the popup.
Once you have made your selections, click Save to apply the changes to the columns shown in the Scanner.
Popping Out the Scanner
The Scanner can also be popped out by clicking the Popout button. This will open the Scanner in a mini window, allowing users to interact with it independently from the main interface.
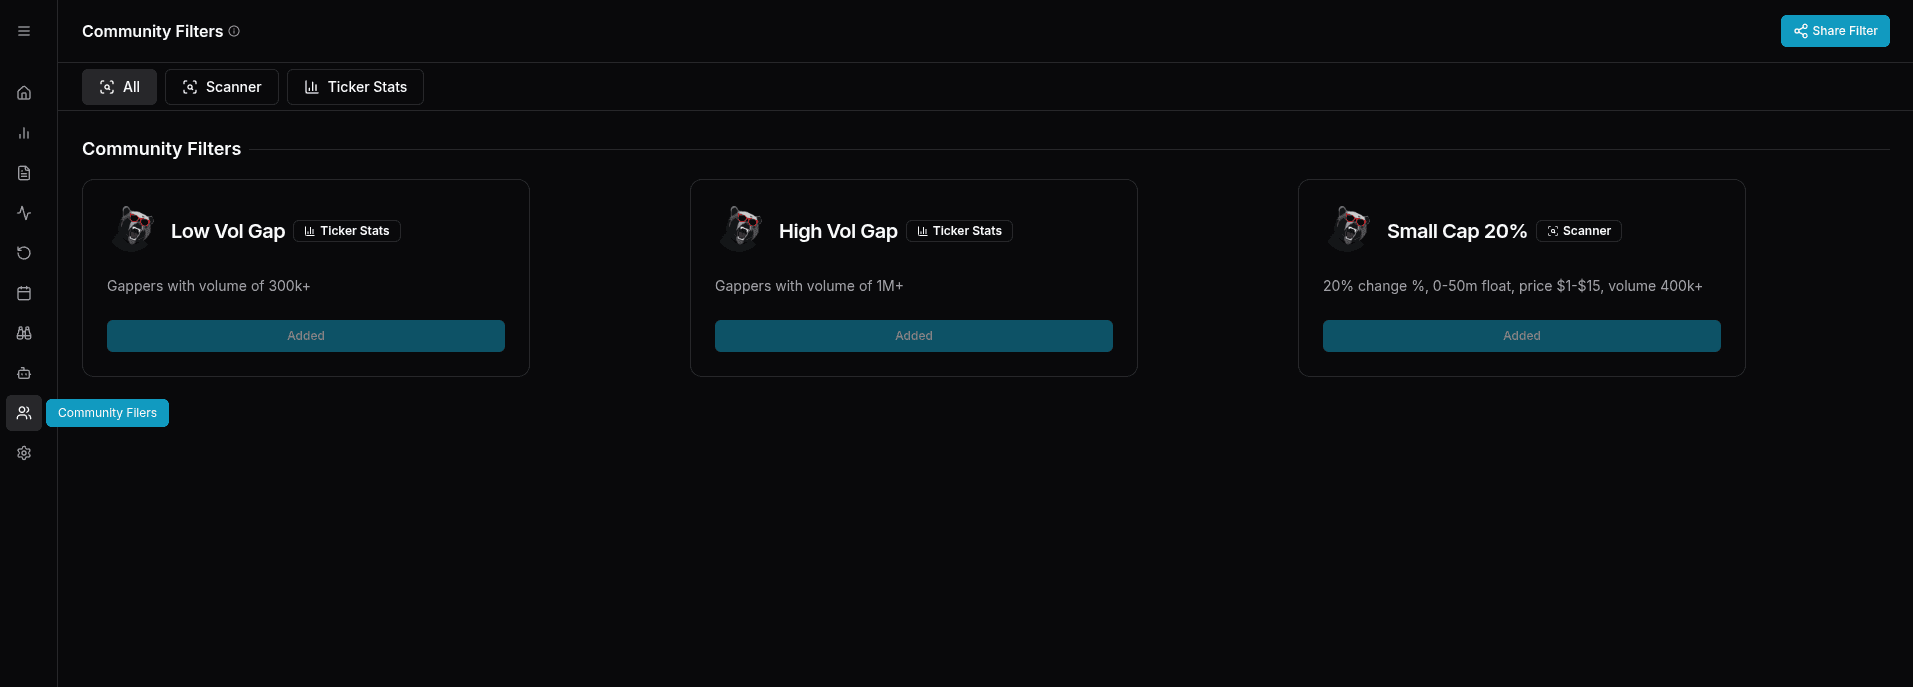
Sharing Filters with the Community
Users can share their filters with others by navigating to the Community Filters section. Here, you can share or add filter profiles. Additionally, filters can be downloaded and shared with others, making it easy to collaborate and discover new filtering strategies.
Enabling Alerts
Users can enable alerts by clicking on the Alert button, represented by the Megaphone icon. This will open a popup asking if they want to enable alerts (Voice only, Sound only, or both) and adjust the volume.
The Sound Triggers tab will include the following options:
-
Price Change Alert
- Percent Change Threshold (%): (customizable)
- Sound: (customizable)
- Test Voice: [Test Button]
-
New High Alert
- Sound: (customizable)
- Test Voice: [Test Button]
-
New Low Alert
- Sound: (customizable)
- Test Voice: [Test Button]
-
New Ticker Alert
- Notification: (customizable)

Conclusion
The Scanner component is a powerful tool for filtering stocks based on user-defined criteria. By utilizing the default filters, creating custom profiles, selecting the desired columns, using the popout feature, and sharing filters with the community, users can tailor their stock scanning experience to meet their specific needs.
Need Help?
- Join our Discord community to share and discover filters
- Check our video tutorials for filter creation
- Contact support for advanced filter configuration
